Tuturials HDR Effect in Photoshop - Today we will see a new tutorial for Photoshop. This time we will see how we can apply to an image HDR effect using Photoshop. Personally it is one effect that I like and the results are very surprising. This effect can be achieved with professional cameras without using Photoshop but as not everyone can afford these cameras, today we will see how we can do with our favorite design program.
Tutorial to create an HDR effect in Photoshop
As always the first thing we have to do is to choose an image to start applying effects. Best high quality image for the effect remains much better. HDR stands for High Dynamic Range mean what in Spanish is High Dynamic Range. To achieve this effect with a camera you need to have three
photographs taken with different exposures, but I have already said that
with Photoshop can be achieved with a photo just as I have used it.
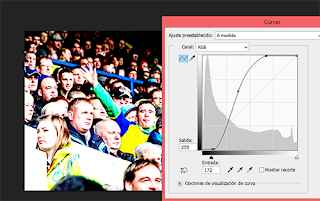
Once the image open we will double the background. So we can press the key combination Ctrl + J. Select the image that we just appear after duplicate and go to the top menu. Image and click on the drop-down that appears to us we go to Settings. We will reappear another menu, finally select Curves. We have already used the curves on occasion, they are to play with the kind of brightness and contrast of our image.
With the curves we must ensure that the image is clearer and dark sides also affected. I leave an image of how they should be so that the effect is applied as we want:
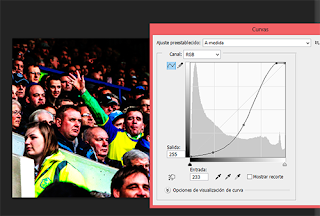
We return to double the main background image. To do this we press Ctrl + J with the selected layer we want to duplicate (the first). We put this layer we just double up, up the other two to work with her and see how the changes are applied. Now we apply the curves, but this time in a completely different, just the opposite way. I again to paste a screenshot so you can see that values take:
With
this we have done we have achieved all three images with three
different exposures, such as is done with a professional camera that
allows for HDR images. Now let's combine these images to achieve the effect in our photo.
Select the second layer, where we apply the clear curves. Select all by pressing Ctrl + A keys and go to the top menu, click on Edit and Copy. We will have the copy on our clipboard.Unglued, for the moment, let us layer to the third layer to the layer to which we applied the dark corners. Let's create a layer mask. To create a layer mask select the layer in question and down all our layers created a series of icons. Then we hit the third from the left. Done this already have created our layer mask.
Now we want to isolate. This is done by pressing the Alt key and hold this key click on the newly created layer mask. We'll know we've done well this process if our whole composition is white.Now
let's paste the image we had in the clipboard that matched the layer 2.
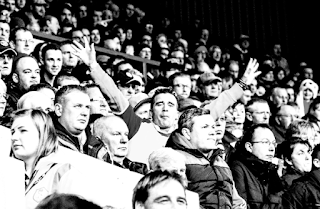
We can press Ctrl + V to paste or go to Edit -> Paste. When we stick it appears in black and white, as I show below. If you leave so we are doing things right.
It's time to apply a blur. In the top menu we follow these steps: Filter -> Blur -> Gaussian Blur. Let's give a value of 20 pixels radius. Depending on each image will be better one or the other value. If at the end you is not quite right you can change these values as they are designed for a large image.We now come to the final steps. Now we go to the second created layer, with the clear curves. Here we create a new adjustment layer, as we create a layer mask but this time we chose the fourth icon from the left. A menu appears, click on Curves and adjust until we see it fit. Here Fiaros your intuition and taste to define your curves.
We repeat this process in the layer created with dark curves, the third. The layer having the Gaussian blur and mask layer. We also created a set of curves layer. And as in the previous case we giving values depending on how we want to be the image.
Now if we're finished. But we must lower the opacity of the two adjustment layers we just created 50%. In the box layers we have the option of putting percentages to lower the opacity. Save and ready, we have our HDR image.
Before and after the HDR effect in Photoshop
It only remains to see the result and as you see has been worth all the effort. The result is really interesting and allows us to give more strength to the image.


No comments
Your Comment Here..!